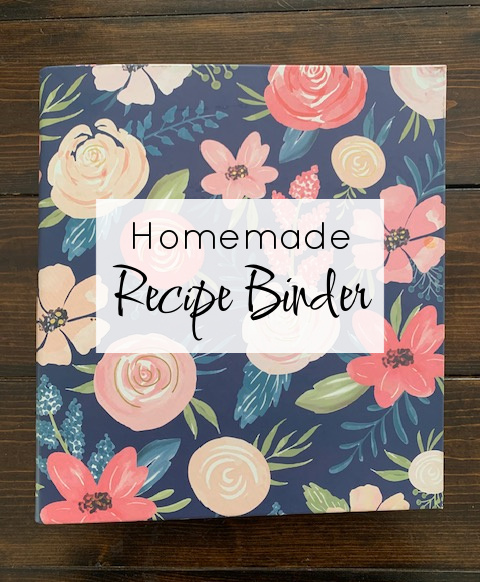
Selfmade Recipe Binder – Kristin Sterk

Should you’re something like me, you’ve acquired a STACK of printed recipes from the web. Typically I believe “I’ve acquired pork chops, what’s recipe to make?” I may look by my cookbooks, however I’m often on the lookout for one thing particular and and I need it NOW (that’s a complete different concern).
I instantly soar on the web, search for the 5-star ranking with essentially the most evaluations, and print it. Generally, we adore it, and so I add the recipe to the stack.
A number of years in the past, whereas recovering from chemo, I had a lightbulb second – why not create my very own do-it-yourself recipe binder with printed recipes? I’m positive I may purchase one, however I needed a easy binder that I may have as many classes as I needed, together with having the ability to improvise as wanted.
I’ve to let you know, I had a lot enjoyable making it and I believe you’ll too! It’s going to take a bit of little bit of time, however when you get it arrange the best way YOU need it to be, you’ll surprise the way you ever did with out it?
HOMEMADE RECIPE BINDER
- Begin with buying a 2 inch, 3-ring binder. I discovered some actually cute floral binders on Amazon. You could possibly get away with a 1″ or 1 1/2″ in. binder, however I needed to permit my binder to develop, so I began huge, and I’m glad I did!

- Take your binder to a craft retailer (if you wish to match colours) and purchase as many items of cardstock as classes you should have.

- Buy tabs for variety of classes wanted. I bought THESE 1.5″ Self-Adhesive Tabs. These are available a bundle of fifty (you could not want that many) and I’ve used them for different causes as properly!
- Use a 3-hole punch for the cardstock and put in binders. Make certain to have the order of colours found out earlier than you connect the tabs. Additionally 3-hole punch your recipes.

- Fastidiously connect tabs to cardstock. I’m a bit OCD, so it took a bit of time to get the tabs lined up excellent, however it was price it for my OCD eyes and mind!
- Print labels for the tabs. You may simply create them in Google docs or Phrase, or use the paper given, which I all the time battle to make use of! I might recommend printing them on cardstock and folding them over, in order that they’re double the thickness and keep within the tabs higher. Listed below are the classes I included in mine: appetizers, snacks, drinks, soups, salads, breads, greens, breakfast, hen, seafood, beef, wild recreation, pastas, Mexican, Chinese language, dessert, bars, canning, freezing, air fryer, dinners, and different.
- Insert the labels into the tabs.

- Begin organizing your recipes! That is the enjoyable half…

This has been a GAME CHANGER for me! My recipes now are utterly organized simply the best way Kristin likes it :). I can add any recipe to my guide at any time, and might even add completely different classes within the again if wanted. When you have questions on how you can make this or for those who’ve made one thing related, please remark under! And if you find yourself making one, please e mail me your ultimate undertaking. I’d like to see it!